6 Easy Ways To Clean Your Dryer Vent
6 Easy Ways To Clean Your Dryer Vent
Your clothes dryer has a filter that collects lint when laundry tumbles inside the dryer. After some time, lint will eventually build up and enter the ductwork of your home. Lack of routine maintenance could put your home at risk of having a fire.
If you do not clean your lint filter and dryer vent on a regular basis, you can put your home at risk of fire. The United States Fire Administration estimates that clothes dryers cause more than 2,900 home fires each year. A dirty dryer vent can also increase drying time and increase energy costs, in addition to being a fire threat.
Learn more about how easy it is to clean your dryer vent at home.
Lint BuildUp
You probably have clogged ductwork if it’s taking longer to dry your clothes, or if you notice that the dryer top gets hot after using it.
The removable dryer lint filter collects the majority of the lint that goes into a load of laundry. Lint, though, may get through the filter and become trapped in crevices along the dryer duct. When lint builds up, airflow is restricted, which can lead to overheating. If the air within the duct becomes too hot, it may spark the lint and start a dryer fire.
There are several ways to tell that there is a lint buildup in your dryer, suggesting that it needs to be thoroughly cleaned, like:
- Clothes are cooler than normal at the end of the drying period.
- The outside of the dryer becomes very hot.
- Clothes take longer to dry or do not fully dry.
- The outside exhaust vent flapper does not open all the way, suggesting low exhaust velocity.
- The laundry room gets significantly more warm than normal.
- The laundry room has a burnt smell.
How to Clean a Dryer Vent Duct
Doing it yourself can help you better understand how the dryer vent works, but it is still best to hire a professional to do the dryer vent cleaning.
The tools you would need to clean your dryer vent are a vacuum with a long hose connection, a dryer vent brush kit, screwdrivers, and UL-listed metal foil duct tape.
Step 1
Determine where the duct starts and finishes. Most dryers have a 4-inch diameter exhaust in the back that attaches to the ductwork with an aluminum elbow. Hot air passes through such pipes and exits your home through a hole in an exterior wall.
Step 2
Disconnect the dryer safely by unplugging it from the outlet or shutting off the gas or propane valve. Remove any clamps or metal tape that are holding the dryer vent pipe to the exhaust. If you have a natural gas dryer, be very careful not to interrupt the dryer’s gas line when disconnecting the fuel. A gas leak is dangerous; if you are unsure of how to proceed, contact a specialist.
Step3
Remove the vent pipe from the wall duct. Cut the duct cover from the outside exit point, to gain access to the entire ductwork. Depending on the length of the dryer ducts, the dryer vent brush kit should include a lint brush and interchangeable segments that you can attach together. To clean a dryer vent duct effectively, you may need to use special vent brushes.
Step 4
Insert the vent brush into the ductwork and rotate it counter-clockwise, moving the brush as far down the dryer ducts as possible. Attach another section from your brush kit if you require additional length to hit the other end of the vent. Lint trap along the ductwork can be loosen with the brush.
If it is placed higher than the dryer, approach from the outside of the house. Gravity can help remove lodged dirt, and it’s better to vacuum lint on your laundry room floor than it is to see it clutter your landscaped areas. Try to scrub the interior of the dryer socket whilst you’re at it.
Step 5
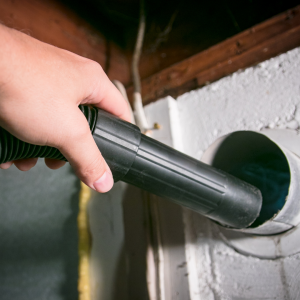
Vacuum all of the lint that comes out of the duct work. (Warning: it might be a lot!) Clear out the holes on both sides, as well as the lint trap housing, with the flexible hose attachment. Repeat when necessary until there is no further existing lint to be cleaned.
Step 6
Reassemble the dryer and reconnect it to the power source. Then, before slipping it back into order, giving it a test run. If the dryer works on natural gas, make sure all of the venting is still attached and there are no gas leaks.
Safety Precautions to Consider
Avoid using a soft foil-style vent that attaches to the wall duct when reconnecting your dryer, since these are a proven fire hazard. Most building codes prohibit the use of these and other lightweight plastic tubes. Instead, use an adjustable, rigid 90-degree elbow at the dryer’s exhaust edge.
If you have one of these flexible ducts installed, it is best to substitute it with smooth-walled metal ductwork that has been certified for this use. If the old ductwork cannot be discarded and replaced, it should be removed on a routine basis and thoroughly washed from one end to the other.
- Protecting Your Property: Why the Right Cleaning Method Makes All the Difference
- The #1 Thing That’s Dulling Your Curb Appeal (And How to Fix It)
- How Maintenance Bundles Provide Peace of Mind for Busy Small Business Owners and Facility Managers
- Essential vs. Complete Home Packages: Choosing the Right Preventive Care for Your Property
- How a Simplified Service Model Benefits Both Homeowners and Franchisees Alike


