Mastering Driveway Cleaning: A Comprehensive Guide with HomeSmiles
Preparing Your Driveway for Pressure Washing
Before diving into the pressure washing process, it’s crucial to adequately prepare your driveway. This step ensures better results and helps protect the surface from potential damage. Here’s what you need to know:
What Do You Spray On Driveway Before Pressure Washing?
Before firing up your pressure washer, it’s essential to pre-treat your driveway with the right solution. This pre-treatment helps loosen dirt, grime, and stubborn stains, making them easier to remove during the pressure washing process.
Recommended Cleaning Solutions:
- A mixture of mild detergent and water: This solution is effective for general cleaning and removing light stains.
- Degreaser or oil stain remover: For driveways plagued with oil stains from vehicles, using a degreaser or oil stain remover can help break down the grease before pressure washing.
- Mold and mildew cleaner: If your driveway has mold or mildew buildup, use a specialized cleaner designed to eliminate these organic growths.
By applying the appropriate cleaning solution to your driveway and allowing it to dwell for a sufficient amount of time, you’ll optimize the effectiveness of your pressure washing efforts. This step is crucial for achieving a thorough clean and maintaining the overall integrity of your driveway.
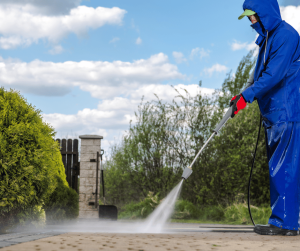
Is It Ok To Pressure Wash A Driveway?
Absolutely! Pressure washing is a safe and effective method for cleaning driveways, provided it’s done correctly. With the right equipment, techniques, and precautions, pressure washing can remove years of dirt, grime, and stains, revitalizing the appearance of your driveway.
Advantages of Pressure Washing:
- Efficient cleaning: Pressure washers deliver high-pressure water streams that can blast away even the toughest stains and debris, saving you time and effort compared to manual scrubbing.
- Versatility: Pressure washers can be used on various driveway surfaces, including concrete, asphalt, and pavers, making them suitable for different types of driveways.
- Preventative Maintenance: Regular pressure washing helps prevent the buildup of dirt, mold, and other contaminants, extending the lifespan of your driveway and reducing the need for costly repairs.
However, it’s essential to exercise caution when pressure washing to avoid damage to your driveway or surrounding areas. Using the wrong pressure setting or holding the nozzle too close to the surface can result in etching, pitting, or surface damage. Always follow manufacturer guidelines and best practices to ensure a safe and effective pressure washing experience.
Equipment and Pressure Requirements
In the realm of driveway cleaning with a pressure washer, having the appropriate equipment and understanding pressure requirements can make all the difference between a job well done and potential mishaps. Let’s delve into what you’ll need and how to navigate pressure settings effectively:
Essential Equipment:
- Pressure Washer: A reliable pressure washer tailored for residential use is your primary tool. Look for models offering adjustable pressure settings and a variety of nozzle options for versatility.
- Extension Wand: This handy accessory extends your reach, allowing you to tackle high or tricky spots on your driveway without strain.
- Safety Gear: Don’t overlook safety! Equip yourself with safety goggles, gloves, and sturdy, closed-toe shoes to shield against debris and water splashes.
- Cleaning Solutions: Selecting the right cleaning solutions tailored to your driveway’s surface and the nature of the stains is pivotal for optimal results.
Understanding Pressure Requirements:
Pressure washers are categorized by their pounds per square inch (PSI) and gallons per minute (GPM) output. PSI signifies water pressure, while GPM denotes the water flow rate.
Recommended PSI Ranges:
- Concrete Driveways: For most concrete surfaces, aim for a PSI ranging between 2500 and 3500. Higher PSI may be warranted for stubborn stains or significant grime buildup.
- Asphalt Driveways: Opt for a gentler PSI range of 1500 to 2500 to avoid potential damage to the softer asphalt.
- Paver Driveways: The PSI requirement varies based on the paver type and condition. Begin with a lower PSI setting and adjust gradually as needed.
Selecting the appropriate pressure setting is critical to safeguard your driveway’s surface from harm. Commence with a lower pressure setting and fine-tune as you assess the cleaning needs.
Key Considerations:
- Invest in Quality Equipment: Ensure your gear meets the task’s demands for effective and safe operation.
- Know Your Pressure Needs: Familiarize yourself with the pressure requirements tailored to different driveway surfaces.
- Start Low, Adjust as Needed: Initiate the cleaning process with a conservative pressure setting and make adjustments accordingly to prevent unintended damage.
Equipped with the right tools and pressure knowledge, you’re poised to execute a professional-grade driveway cleaning while safeguarding your property against potential mishaps.
Chemicals and Solutions
When it comes to pressure washing your driveway, the right cleaning solutions can significantly enhance the effectiveness of the process. Let’s explore the importance of using the correct chemicals and solutions tailored to your driveway’s needs:
Selecting the Right Cleaning Solutions:
- General Purpose Cleaners: A mixture of mild detergent and water serves as an excellent all-purpose solution for removing surface dirt and light stains from your driveway.
- Degreasers or Oil Stain Removers: If your driveway bears unsightly oil stains from vehicles, employing a specialized degreaser or oil stain remover can effectively break down grease and oils before pressure washing.
- Mold and Mildew Cleaners: For driveways plagued by mold or mildew growth, opting for a dedicated cleaner formulated to eradicate these organic intruders is essential.
Eco-Friendly Alternatives:
- For environmentally-conscious homeowners, several eco-friendly cleaning solutions are available that offer effective results without compromising environmental integrity. Look for biodegradable options that minimize harm to surrounding vegetation and wildlife.
Professional-Grade Solutions:
- Professionals often utilize high-quality, commercial-grade cleaning solutions to tackle stubborn stains and deep-seated grime effectively. While these solutions may come at a premium, they offer unparalleled cleaning power for demanding driveway cleaning tasks.
DIY vs. Professional Products:
- While professional-grade solutions boast potent cleaning capabilities, many DIY-friendly products on the market can yield satisfactory results when used correctly. Pay attention to product instructions and safety guidelines to ensure optimal performance and safety.
Preventative Home Maintenance and Driveway Care:
- Incorporating regular driveway cleaning into your preventative home maintenance routine can help preserve its appearance and structural integrity over time. By addressing dirt, stains, and contaminants promptly, you can mitigate the risk of costly repairs down the road.
Key Takeaways:
- Choose cleaning solutions tailored to your driveway’s specific needs, such as general cleaning, oil stain removal, or mold and mildew eradication.
- Consider eco-friendly alternatives to minimize environmental impact.
- Professional-grade solutions offer potent cleaning power but come at a higher cost.
- DIY-friendly products can yield satisfactory results with proper application and adherence to safety guidelines.
- Regular driveway cleaning is a crucial aspect of preventative home maintenance, preserving its longevity and aesthetic appeal.
The Pressure Washing Process
Now that you’ve prepared your driveway and gathered the necessary equipment and cleaning solutions, it’s time to dive into the pressure washing process. Follow these step-by-step guidelines to ensure a thorough and effective cleaning:
Step 1: Safety First
Before starting, don your safety gear, including safety goggles, gloves, and closed-toe shoes, to protect yourself from debris and water splashes.
Step 2: Pre-Wet the Surface
Using a garden hose or low-pressure nozzle on your pressure washer, pre-wet the entire driveway surface. This helps to loosen surface dirt and prepares the driveway for deep cleaning.
Step 3: Apply Cleaning Solution
Apply the appropriate cleaning solution to the driveway surface, focusing on heavily soiled areas, oil stains, or spots with mold and mildew. Allow the solution to dwell for the recommended time as per the manufacturer’s instructions.
Step 4: Set Up Your Pressure Washer
Attach the appropriate nozzle to your pressure washer wand, adjusting the pressure setting according to your driveway’s surface type and cleaning needs. Start with a low-pressure setting and gradually increase if necessary.
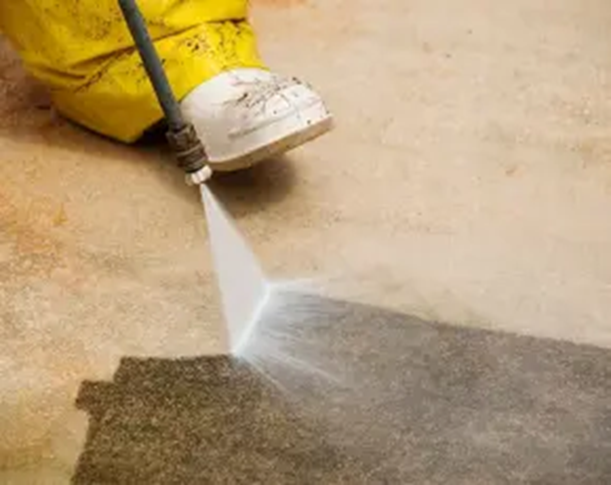
Step 5: Begin Pressure Washing
Starting from one end of the driveway, work your way systematically across the entire surface, using overlapping passes to ensure thorough coverage. Hold the pressure washer wand at a consistent distance from the surface, typically around 6 to 12 inches, to prevent damage.
Step 6: Maintain a Steady Motion
Maintain a steady, controlled motion as you move the pressure washer wand back and forth across the driveway surface. Avoid lingering in one spot for too long, as this can lead to uneven cleaning or potential damage.
Step 7: Rinse Thoroughly
Once you’ve completed pressure washing the entire driveway, thoroughly rinse the surface with clean water using the pressure washer or a garden hose. Ensure all cleaning solution residues and debris are removed from the surface.
Step 8: Allow to Dry
Allow the driveway to air dry completely before inspecting the results. Depending on weather conditions, this may take several hours to a full day.
Step 9: Optional: Apply Sealant
For added protection and longevity, consider applying a concrete sealant or protective coating to the clean, dry driveway surface. Follow the manufacturer’s instructions for proper application and curing time.
By following these step-by-step guidelines, you can effectively pressure wash your driveway to remove dirt, stains, and grime, restoring its appearance and enhancing curb appeal. Regular maintenance and cleaning will help prolong the life of your driveway and minimize the need for costly repairs.
Post-Cleaning Care
Completing the pressure washing process marks a significant step in maintaining your driveway’s cleanliness and longevity. However, proper post-cleaning care is crucial to ensure lasting results and protect your investment. Here’s what you need to do:
Inspect for Residual Stains
After the driveway has dried completely, take a close look to assess if any stubborn stains or areas of concern remain. If necessary, spot treat these areas with appropriate cleaning solutions and repeat the pressure washing process as needed.
Address Cracks and Damage
Inspect the driveway surface for any cracks, chips, or signs of damage that may require repair. Addressing these issues promptly can prevent them from worsening over time and extend the lifespan of your driveway.
Apply Sealant or Protective Coating
Consider applying a concrete sealant or protective coating to the clean, dry driveway surface. Sealants help protect against moisture, UV damage, and stains, prolonging the life of your driveway and enhancing its appearance.
Regular Maintenance Routine
Incorporate regular driveway maintenance into your home care routine to preserve its cleanliness and structural integrity. This may include periodic pressure washing, spot cleaning, and sealing as needed to keep your driveway looking its best year-round.
Gutter Cleaning and Window Washing
While focusing on exterior home maintenance, don’t overlook other essential tasks such as gutter cleaning and window washing. Clogged gutters can lead to water damage and structural issues, while clean windows enhance your home’s appearance and natural light.
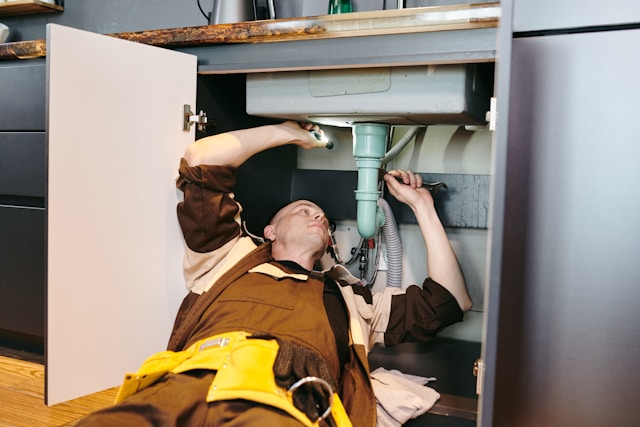
Dryer Vent Cleaning
Additionally, prioritize dryer vent cleaning as part of your preventative home maintenance regimen. Clogged dryer vents pose a fire hazard and reduce appliance efficiency, so regular cleaning is essential for safety and performance.
Final Inspection
After completing all necessary post-cleaning care tasks, take a final walk around your driveway to ensure everything is in order. Address any remaining concerns or areas needing attention to achieve the best possible results.
By following these post-cleaning care guidelines and incorporating regular maintenance into your home care routine, you can extend the life of your driveway and maintain its pristine condition for years to come. Remember, preventative maintenance is key to avoiding costly repairs down the road and preserving your home’s value.
In the realm of home maintenance, ensuring the cleanliness and structural integrity of your driveway is paramount. By leveraging the power of pressure washing and following the comprehensive guide provided here, you can achieve professional-grade results while safeguarding your driveway against the ravages of time and weather.
From preparing your driveway with the right cleaning solutions to selecting the appropriate pressure settings and executing the pressure washing process with care, each step plays a crucial role in maintaining your driveway’s appearance and longevity. Remember to prioritize safety at every stage of the process and adhere to manufacturer guidelines and best practices to avoid damage to your driveway or surrounding areas.
As you embark on your driveway cleaning journey, consider incorporating other exterior home maintenance tasks, such as gutter cleaning, window washing, and dryer vent cleaning, into your routine. A holistic approach to home maintenance, like the one offered by HomeSmiles, ensures that all aspects of your home are cared for, minimizing the risk of costly repairs and enhancing your home’s overall value and curb appeal.
By staying proactive and diligent in your home maintenance efforts, you can enjoy a clean, well-maintained driveway that adds beauty and functionality to your property for years to come. With HomeSmiles by your side, you can rest assured that all your home maintenance needs, both interior and exterior, are being taken care of, allowing you to focus on what matters most—enjoying your home to the fullest.
- Protecting Your Property: Why the Right Cleaning Method Makes All the Difference
- The #1 Thing That’s Dulling Your Curb Appeal (And How to Fix It)
- How Maintenance Bundles Provide Peace of Mind for Busy Small Business Owners and Facility Managers
- Essential vs. Complete Home Packages: Choosing the Right Preventive Care for Your Property
- How a Simplified Service Model Benefits Both Homeowners and Franchisees Alike